

Most people dread packing because they have no idea where to start. When they finally get started, they may overthink things and worry about the integrity of their belongings. This detailed guide provides you with a solid system for packing to take away the uncertainty that stops you from starting, and gives you practical instructions for packing boxes that help you conserve materials and keep your belongings secure.
In my 35+ years in the moving industry, I have personally packed and completed thousands of moves. I can tell you right away which boxes will stack cleanly in a truck and which ones are waiting to cave in under their own weight. Packing correctly does not take twice as long, and it definitely does not mean wrapping a cardboard carton until it looks like an Egyptian mummy.
Whether you are packing up a four-bedroom house, moving into a smaller apartment, or getting ready for your very first relocation, here is the complete professional method to properly pack boxes for moving.
Some Rules to Professional Box Packing
Before taping a single flap, keep these four rules in your back pocket:
- Heavy items go in small boxes, light items go in big boxes. Never put books, dumbbells, heavy hand tools, or canned food into a large box. Small boxes (1.5 cubic feet) are meant for heavy, dense objects. If a box is too heavy for you to lift comfortably with two hands, it is a hazard for you and for the movers stacking it.
- Eliminate dead space completely. Cardboard boxes do not hold up the weight in a moving truck on their own. The contents inside provide structural support. If you leave a four-inch empty space at the top of a box, the box stacked on top of it will crush the lid right down. If there is empty space, fill it with crumpled unprinted newsprint paper or clean linens.
- Build a cushion top and bottom. Fragile items should never touch the cardboard bottom or top flap directly. Always lay down a 2-inch to 3-inch bed of crumpled paper before placing items in, and finish with a padded paper layer before folding the top shut.
- Pack in layers, heaviest to lightest. Within any individual box, the dense items sit at the bottom, and lighter, delicate items sit near the top.
The Only Packing Supplies You Actually Need
Hardware stores will try to sell you endless plastic gadgets, foam pouches, and shrink wraps. After decades in the moving business, here is the short, honest list of what I know gets a house packed safely without wasting money:
- Standardized Corrugated Boxes (32 ECT / 200 lb test): Stick to uniform sizes (Small, Medium, Large, Dish Pack, Wardrobe). Uniform sizes stack like Lego bricks in a truck; mismatched grocery boxes create uneven, falling stacks.
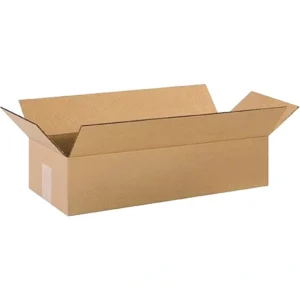
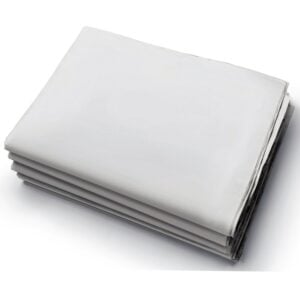
- Unprinted Newsprint Paper (10–25 lb bundle): This is your workhorse. Never use printed newspapers, the ink rubs off on china, glassware, and white lampshades, requiring hours of washing later.
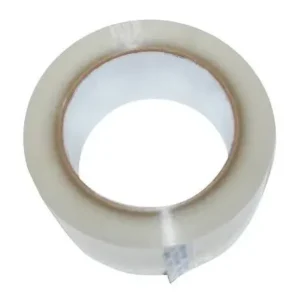
- 2-Inch Heavy-Duty Packing Tape: Skip cheap cellophane tape or masking tape (which dries out and peels in transit). Use standard 2-inch acrylic or hot-melt packing tape.
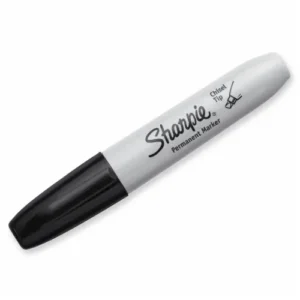
- Black Chisel-Tip Permanent Markers: Thick markers are easy to read from across a room or truck bed.
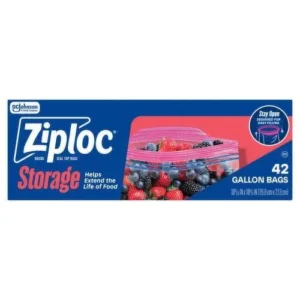
- Ziploc Sandwich & Gallon Bags: Essential for keeping furniture screws, shelf pins, and TV mount bolts with their respective items.
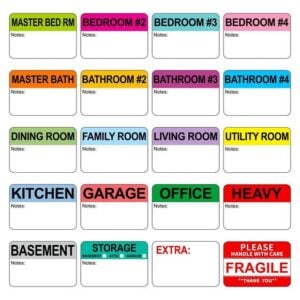
- Colored Masking Tape or Moving Labels: For room-by-room color-coding on doorframes and box sides.
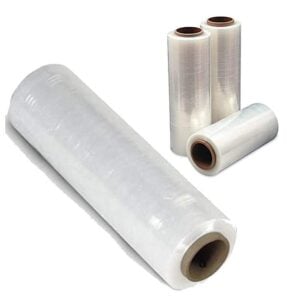
- Stretch Plastic Wrap (1 roll, 5-inch or 15-inch): Use this sparingly to bundle curtain rods, broom handles, or keep dresser drawers from sliding open.
Choosing the Right Box for the Job
Free grocery store boxes with open banana handles might sound like a great money-saver, but used grocery boxes have weak seams, odd dimensions that do not stack evenly, and might bring unwanted pests into your new home.
Stick to clean, uniform, corrugated moving boxes rated at minimum 32 ECT (Edge Crush Test) or 200 lb test strength.
|
Box Type |
Typical Size / Volume |
Ideal Items to Pack |
Weight Limit Target |
|
Small Book Box |
1.5 cu. ft. (16″ x 12″ x 12″) |
Hardcover books, records, heavy hand tools, canned pantry goods, small dense electronics. |
Max 40–45 lbs |
|
Medium All-Purpose |
3.0 cu. ft. (18″ x 18″ x 16″) |
Pots, pans, small kitchen appliances, toys, folded clothes, shoes, decor. |
Max 45–50 lbs |
|
Large Linen Box |
4.5 cu. ft. (18″ x 18″ x 24″) |
Pillows, comforters, winter coats, lampshades, board games, towels. |
Max 40 lbs |
|
Extra Large |
6.0 cu. ft. (24″ x 24″ x 24″) |
Large blankets, bulky lightweight cushions, seasonal wreaths, sleeping bags. |
Max 40 lbs |
|
Dish Pack (Double Wall) |
5.2 cu. ft. (Heavy Duty) |
Dinner plates, china, glassware, stemware, framed ceramics, fragile heirlooms. |
Max 60 lbs |
|
Wardrobe Box |
24″ x 24″ x 48″ with metal bar |
Hanging clothes on hangers, formal suits, long coats, draperies, curtain panels. |
Max 75 lbs |
How to Properly Tape a Box
This is the biggest mistake I see home packers make every single day.
People think that wrapping three entire rolls of tape in criss-cross spiderwebs around every corner and seam makes a box stronger. It does not. Packing tape runs around $3 a roll, and when you are packing 100 boxes or more, wasting half a roll per box adds hundreds of wasted dollars and hours of wasted time.
The Professional Two-Strip Method
Here is the straightforward method I demonstrate in the video below:
- Fold the flaps in square: Fold the two smaller side flaps in first, then fold the two large outer flaps flat over them. Never interlock flaps into an accordion pattern. Interlocking flaps weakens the cardboard and guarantees the bottom will buckle under weight.
- The Center Seam: Run one clean strip of 2-inch heavy-duty packing tape right down the center seam where the outer flaps meet. Make sure the tape extends about 2 to 3 inches over each edge onto the sides of the box. Press it down firmly with your hand to activate the pressure-sensitive adhesive.
- The Diagonal Support: Run a second strip diagonally across the box bottom from corner to opposite corner. That single diagonal strip locks the box square, prevents torque twisting, and distributes the downward force of whatever is inside.
- The Top Flaps Need Even Less: Once the box is packed full to the brim, fold the top flaps down. For normal, lightweight household goods, one single strip down the center seam is all you need. If the box contains fragile or denser items, add one diagonal strip.
Do not wrap tape around the side rims or encircle the whole box in endless loops. It does nothing to support the structural weight of the cardboard.
I uploaded this video 13 years ago, but the timeless method stands. Take 90 seconds to watch me break down how simple this really is:
Room-by-Room Packing Instructions
1. The Kitchen (Dishes, Glassware, and Cookware)
The kitchen takes the longest of any room in the house. Never leave it for the final weekend.
- Plates belong on their edges, never flat: Think of how a restaurant dishwasher loads dishes into a rack. Wrap each plate in unprinted newsprint paper, bundle 3 or 4 wrapped plates together, and stand them vertically on their rims inside a heavy-duty dish pack box over a thick 3-inch paper base.
- Cups and Stemware: Wrap each glass individually, tucking paper inside the cup cavity for internal support. Pack stemware upright on its foot, never on its side. Use cell dividers inside the box if you have them.
- Pots and Nesting Pans: Nest smaller pots inside larger pots with a layer of packing paper between them to prevent scratching nonstick surfaces.
2. Books, Records, and Documents
- Always use small 1.5 cu. ft. book boxes.
- Lay heavy hardcovers flat, spine to spine, or stand them upright with the paper edges facing down.
- Vinyl records must be packed vertically on edge, just like store browsing racks, packed snugly so they cannot lean and warp.
3. Clothes, Linens, and Bedding
- Wardrobe boxes save hours: Instead of taking clothes off hangers, folding them into suitcases, and ironing them at the other end, transfer 30 to 40 hangers straight into a wardrobe box.
- Use the empty bottom of wardrobe boxes for bulky lightweight items like throw pillows or sneakers in clean bags.
- Pack folded garments, bed sheets, and comforters in medium and large boxes. These also serve as excellent shock absorbers for padding awkward gaps in other boxes.
4. Fragile Art, Mirrors, and Electronics
- Mirror and Picture Cartons: Telescoping 4-piece picture boxes adjust to the exact dimensions of your framed glass. Wrap framed art in bubble wrap, tape an “X” of painter’s tape across glass faces to prevent shattering, and pack vertically.
- Electronics: Take clear cell phone photos of your TV, receiver, and router wire setups before unplugging anything. Pack components in original manufacturer boxes whenever possible, or wrap with anti-static bubble wrap.
Never Lose a Screw: The Bag-and-Tape Hardware Rule
The fastest way to ruin your first night in a new home is unpacking a bed frame and finding that the bolts are lost in an unnamed box.
- When taking down bed frames, tables, desks, or wall mounts, immediately place all screws, nuts, and washers into a quart-sized Ziploc bag.
- Label the bag with a permanent marker (e.g., “Master Bed Frame Bolts”).
- Use blue painter’s tape or stretch wrap to tape the bag directly to the main headboard rail or the underside of the tabletop.
- For TV setups, bundle cords with velcro ties, label them with painter’s tape flags (e.g., “Cable Box HDMI 1”), and slip them into a gallon bag taped to the back of the set or inside the original TV carton.
How to Pack Boxes for Moving to a Smaller Place (Downsizing Tips)
Downsizing from a larger single-family home to a condo, apartment, or townhome requires an aggressive pre-packing filter. Packing items you will not have square footage for is expensive double work.
- Sort into four piles before assembling a single box: Keep, Sell, Donate, and Discard. If you have not used, worn, or displayed an item in the past twelve months, do not waste tape and box space on it.
- Measure your new room dimensions early: Do not pack heavy armoires or massive desks without knowing exactly where they will fit. If an oversized piece will block a radiator or hallway in the new floor plan, sell or donate it locally before moving day.
- Audit duplicates: You do not need four sets of sheets for a single guest bed or three sets of mixing bowls. Keep your best primary set, one backup, and donate the rest.
- Digitize files and media: Bulky filing cabinets filled with 10-year-old tax receipts, manuals, and CDs consume dozens of heavy book boxes. Scan essential files to cloud storage and clear out the paper weight.
Box Labeling That Actually Speeds Up Unpacking
A marker scribble that just says “Stuff” or “Misc” on top of a box guarantees confusion the moment the movers carry it inside.
- Label the sides, not the top: When boxes are stacked four high in your new living room, you cannot read the top lids. Write your labels on at least two adjacent sides.
- Use a simple two-part formula:
- Line 1: Destination Room (e.g., MASTER BEDROOM, KITCHEN, UPSTAIRS BATH).
- Line 2: Key Contents (e.g., Everyday Pots / Skillets / Spices).
- Color code by room: Use colored tape strips or colored markers (e.g., Blue = Master Bed, Yellow = Kitchen, Green = Living Room). Tape matching color cards on the doorways of the new home so movers drop boxes in the correct rooms without having to ask every thirty seconds.
The “Open First” Box: What You Need for Night One
Never load your toothbrush, bedding, and coffee maker into random unnamed boxes. Pack one clear plastic tote or clearly marked box per family member labeled OPEN FIRST:
- Bed linens, pillow, and a towel for night one.
- Basic bathroom toiletries, medications, and toilet paper.
- Phone chargers and power strips.
- A box cutter, a roll of trash bags, and paper towels.
- Basic hand tools (screwdriver, wrench, pliers) to reassemble bed frames.
- Pet food, bowls, and a can opener.
What You Cannot Pack in Moving Boxes (The Non-Allowables)
Whether you hire professional movers or drive a rental truck, federal safety rules and common sense dictate that certain hazardous, perishable, or irreplaceable items must never go inside a taped box on a truck:
- Flammable & Combustible Items: Propane tanks, lighter fluid, gasoline cans, matches, aerosol cans, fireworks, motor oil, and paint thinners.
- Corrosive Chemicals & Cleaners: Household bleach, ammonia, drain cleaner, pool chemicals, and car batteries.
- Perishable Food: Fresh produce, opened dairy, and raw meats (sealed canned goods and dried dry-goods in small boxes are fine).
- Coffee maker, mugs, and ground coffee for the morning after.
- High-Value Irreplaceables: Family heirlooms, legal passports, birth certificates, deeds, cash, fine jewelry, and essential daily prescriptions. Keep these in a personal lockbox or backpack in your own car.
Keep this box in your personal vehicle instead of putting it on the moving truck, so you have immediate access no matter what time the truck arrives.
Need a Hand With Packing or Moving?
Packing an entire house properly takes an average family between 30 and 50 hours of active labor. If your schedule is tight, or if you have delicate antiques, grandfather clocks, or high-value art, you do not have to tackle it alone.
Slattery Moving & Storage offers full-service packing, fragile-only kitchen packing, custom wooden crating, and secure, climate-monitored storage across the Hudson Valley, New York, and long-distance routes.
Reach out to our team today for a Guaranteed Quote… no surprises, and let our family take the stress out of your next move.